Salkantay Trek (Without a Guide) – Alternative Route to Machu Picchu
Please feel free to ask any questions (leave a comment or drop me an email) – more than happy to share as much as possible from our experience to help others!
(Looking for the Day-by-day walkthrough? Jump to it here)
How difficult was this hike?
We have never hiked before this experience, though we lead a active-ish lifestyle (he bikes and I run). This hike proved to be doable with a pinch of adventurous spirit, and a ton of GUTS! Here are some challenges we went through: snow, ice, rain, high-altitude, camping in a middle of nowhere. It’s almost as if we turned to pro-hikers overnight! (Humor me please) Did I mention Mark proposed right after we returned? 🙂
Disclaimer: On hindsight it was rather dangerous to not have any hiking experience prior to embarking on this journey. But it made for an awesome first hiking experience
Planning for the hike definitely wasn’t easy. We started by reading up blogs of others that have done this hike themselves. You should also read up other tours to get familiar with the route and the amount of time it’s going to take.
Why go without a guide?
We are definitely not a tourist-type couple (then again, I might be speaking for Mark here, who’s maybe 40% less of a risk-taker than I am). I like to experience a place without pressure of complying with the group and be free to explore as and when I want. Also it would be nice to go at your own pace. You eat when you want, rest when you want, detour when you want.
Research
Here are some helpful blogs of other encounters of the trip that we found very helpful. Everyone will have a different experience but nonetheless, it will help set some expectation as to what you could encounter. Note that the trek may have changed throughout the years (there are a couple of things mentioned we didn’t see) so do your own research as well! Great references nonetheless!
Also note that there are different “versions” of the Salkantay route: some choose to skip Mollepata to Soraypampa on the first day (which we did) and some chose to go to Santa Teresa instead of hiking through Llactapacta on the last day etc. It also depends on how fast you’d expect to go at, and how many days you have.
Thanks to all these useful blogs! We actually took snapshots from each and combined them into “notes”!
- Salkantay trek macchu picchu:http://salkantaytrekmachupicchu.blogspot.com/
- Seekingfocus.com:http://www.seekingfocus.com/travelsickness/2010/11/salkantay-introduction/
- Backpackforever.com:http://www.backpackforever.com/knowledge/3/south-america/peru/hiking-the-salkantay-trail-to-machu-picchu-without-a-guide
- Grundygapyah:http://grundygapyah.wordpress.com/2012/07/21/salkantay-trek-without-a-guide-advice-for-others/
Maps
I like the map from Andeantravel. They also have a sample trip itinery here: http://www.andeantravelweb.com/peru/treks/salkantay.html
Personally, we both used the maps only as a reference to guesstimate how we would be going through the hike. It’s really no use when you are on the trek itself. Most of the time you’d be able to figure out the trails (which are not clearly marked, but you could tell where the path generally goes), following/asking someone, or based off other blogs or photos from others who have done it.
We also created a little “route” step by step similar to what Salkantay Trek MP did.
Weather / Gear
Since we are not seasoned hikers (at the time anyway), we don’t have a lot of camping equipment, and rented most of our gear from Outdoorsgeek.com.
There are other sites such as Lowergear.com, Mountainsidegearrental.com offer similar prices, but it depends on what you want to rent as well so shop around! You can also rent gear from REI / EMS or local stores if you are located at popular hiking states.
Note that we went Mid-July, during South American winter. Temps were an average of 60F in the day and down to low 30s at night in Cuzco. Though it was supposedly the “driest” season, we experienced almost 2 full days of rain during this hike. When hiking the trek, the first day will likely be colder than the rest of the other days if you are going through the pass on the first day. It SNOWED (more on that later) but with what we had we were able to keep warm.
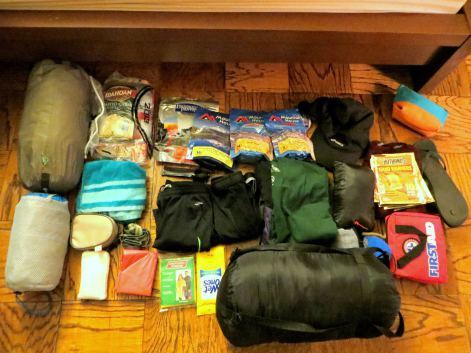
Packing List
Our packs are about 22 lbs – 25lbs each, (not accounting for water weight)
- Packs: 60L packs, which turned out to be the perfect size for this hike
- Tent: Big Agnes Seedhouse SL 2
- Sleeping bags: Marmot Trestles 15F
- Air mattress pads: Big Agnes insulated air core
- Water filter pack
Food
- Jetboil flash (for boiling water)
- Gas canisters (1 small one was enough. Buy it in Cuzco if you’re flying in, because this isn’t allowed on the plane)
- Freeze dried food. Try Mountainhouse, Backpacker’s pantry. We brought enough for 1 breakfast per day and 1 dinner per day, but ended up not eating any of the ones for breakfast :/
- Bars – they are heavy, but helped us when we were too cold / lazy to cook. CLIF bars or PRO Meal bars are great. We also brought a pack of beef jerky each (real pick-me-upper)
Clothes & Accessories
- Headlamps – we brought 1 each. I used my running headlamp, more than enough light!
- Spare batteries for headlamps
- Down jacket
- Waterproof / rain jacket
- Waterproof hat / cap
- Waterproof /water resistant pants
- Warm thermal pants, thought i survived with just a good quality warm running pants
- Hiking boots (Mid)
- Thermal long sleeve
- Fleece / hoodie
- Wool socks
- Warm gloves, good if they are water resistant. if not, bring 2
- Underwear. Because.
Misc
- First aid kit – include Bandaids, Advil (for altitude headaches), Tylenol / Panadol (for fevers / cold), electrolytes, something for upset stomach, moleskin
- Water treatment tablets (we didn’t use any)
- Bags for dirty clothing
- Extra Ziploc bags
- Knee guard
- Cash – be sure to have change, like ½/5 soles coins to pay locals for water/food
- Toilet paper
- Camping soap / shampoo
- Wet wipes
- Small towel
- Sunblock and deet (mosquito-galore in Santa Teresa. They’re VICIOUS. You have been warned.)
- Moisturizer + lipbalm
Acclimatizing to High Altitude
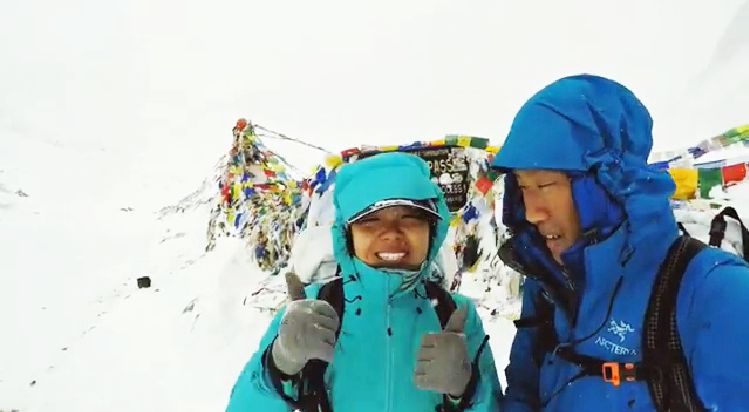
The hike starts off at 2,800m, and goes as high as 4,800 over the Salkantay Pass. We both acclimated for 2 days in Cusco – we survived the rest of the trek without high altitude sickness, but that does not save you from shortness of breath while hiking! Many raved about Mate de coca (Coca tea) – did it help? Perhaps. We drank copious amounts of it over the 2 days when we were in Cusco. I did take Advil on the first night at Cusco because I felt this buzzing headache that I was afraid might make me sick altogether. It went away the next day.
Coca leaves with Yifta can help with altitude sickness. Leaves your teeth a little stained though. Yifta (a Quechua word, apparently “activates” the Coca by alkalizing your mouth) was difficult to get – most stores didn’t carry it and gave us a weird look when we asked for it. It made us look cool, given this seem to be an “underground” product 🙂 We did eventually find it in a shady little provision shop.

Water? Snacks along the way?
Unfortunately this wasn’t as comfortable as a hike in Iceland.
We were very careful about water in Peru – always drinking out of the bottles before the hike; ordering drinks sin hielo or without ice; ceviche only from good restaurants. We survived this hike without an upset stomach.
During the hike we did cook using the river water a couple of times – both of which we filtered (but didn’t add water tablets) and boiled. Note that water boils faster at higher altitude, it’s recommended to boil it for longer to kill any sort of bacteria (3 additional minutes for 2 cups).
After the pass, there are also snacks/rest stops offering bottled water along the way. At about 5-7 soles per bottle (not cheap I know) depending on how nice the vendor is.
Walkthrough of the Hike
Day 1 – Start of the hike (Mollepata – Soraypampa – Salkantay Pass)
Day 2 – Huayramachay – Ryanyoc – Challway – Collpapampa
Day 3 – La Playa – Santa Teresa
Day 4 – Hidroelectrica – Aguas Calientas / Machu Picchu Pueblo
2 Comments
Mikey
great guide. Plan to do the exact same trek in August!
Mark
thanks! good luck and please let us know if you have any questions!